Legacy Content Warning
This section of our website is no longer maintained and may not be accurate or reflect our current ideology. Please report any content you believe to be inaccurate to [email protected].
Blog
Configure NFS Mount with Synology NAS on Ubuntu 18.04
In this article, we are going to create an NFS enabled shared folder on a Synology NAS and then configure a persistent file system mount on an Ubuntu 18.04 machine.

Mitchell Musarra
Nov 28, 2018
NFS (Network File System) is a protocol enabling multiple remote connections to a singular shared folder. This is most beneficial in scenarios such as web applications where multiple compute resources are enlisted to read and write from one folder.
Some example use-cases of this include:
- Store Plex media on NAS instead of a virtual machine.
- Store GitLab repositories on NAS to increase redundancy.
- Distributed WordPress deployment with a shared “wp-content” directory for your website.
This article assumes you have a good understanding of the basic networking, Synology DSM and the Linux operating system.
1. Configure NFS Server
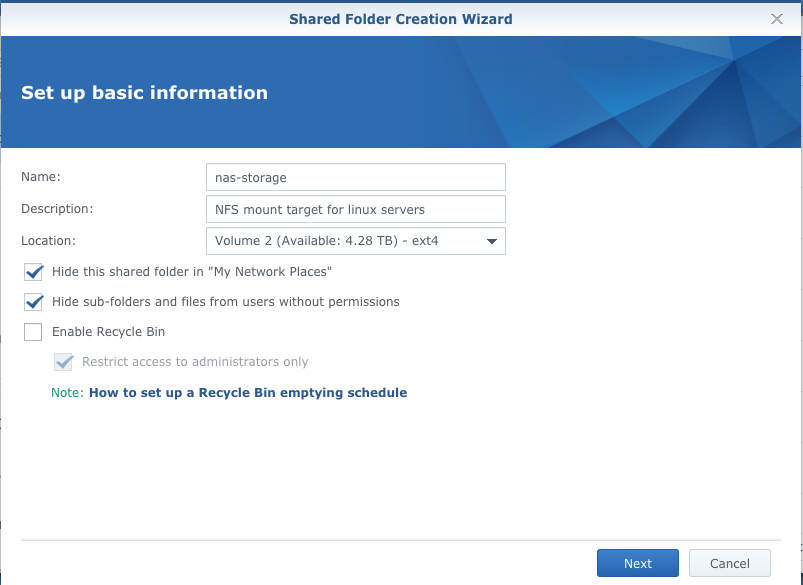
Firstly, log into the Synology DSM and open Control Panel > Shared Folder. Choose “Create” and use the following options:

Note that enabling encryption will prevent you from enabling NFS access to the shared folder.

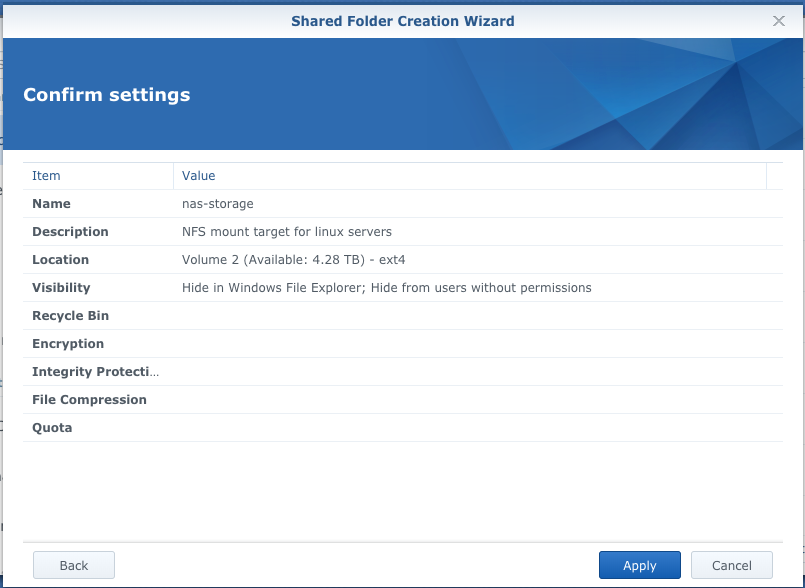
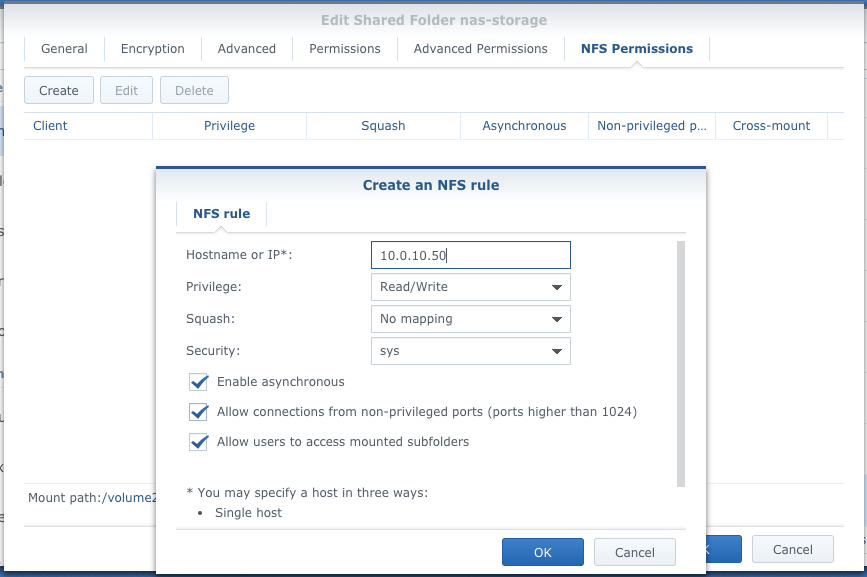
Apply the desired settings or copy from the above. On the permissions screen, navigate to the “NFS Permissions” tab and create an NFS rule for the host(s) you will be using to access the NFS share.

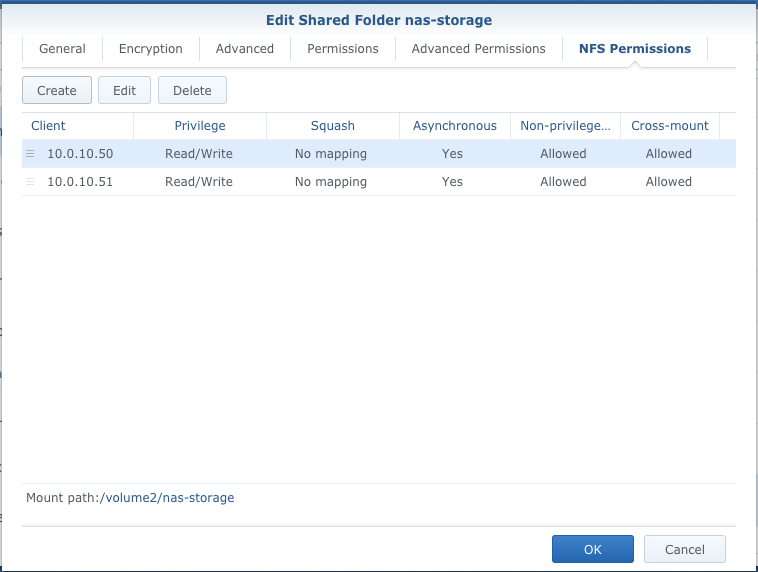
If multiple hosts will be accessing the NFS share, you can add rules for each host.

Take note of the “Mount path” at the bottom of the NFS Permissions screen. In our example, the mount path is “/volume2/nas-storage”.
2. Configure Client
Install everything necessary and create a directory we can mount the share to. In this example, the local mount directory will be “/nfs/general-storage” but you can make it whatever you like.
$ sudo apt-get update && sudo apt-get install nfs-common

$ sudo mkdir -p /nfs/general-storage # Create local NFS mount target
Let’s test out everything so we know for sure it actually works. Replace “10.0.10.100” with the actual IP of your Synology NAS.
$ sudo mount 10.0.10.100:/volume1/general-storage /nfs/nas-storage # Mount NFS share

$ touch /nfs/nas-storage/helloworld.txt # Test
Hopefully, we should see that “helloworld.txt” in “File Station” on the Synology DSM like below:

Next, we will ensure this mount is configured automatically at boot by adding the entry into our “fstab file.
$ sudo nano /etc/fstab
Replace “10.0.10.100:/volume2/nas-storage” with your actual Synology NAS IP address and NFS mount path. Also replace “/nfs/nas-storage” with the real local NFS mount directory you created earlier.
# /etc/fstab:
.
.
.
10.0.10.100:/volume2/nas-storage /nfs/nas-storage auto,nofail,noatime,nolock,intr,tcp,actimeo=1800 0 0
The best way to ensure this configuration is going to work forever is to reboot the entire system and test the local NFS mount directory after start-up.
$ sudo reboot
After reboot, you should have a fully working NFS mount on the client machine. To enable NFS access to other servers on your network, just repeat the process!